 Save to Pinterest
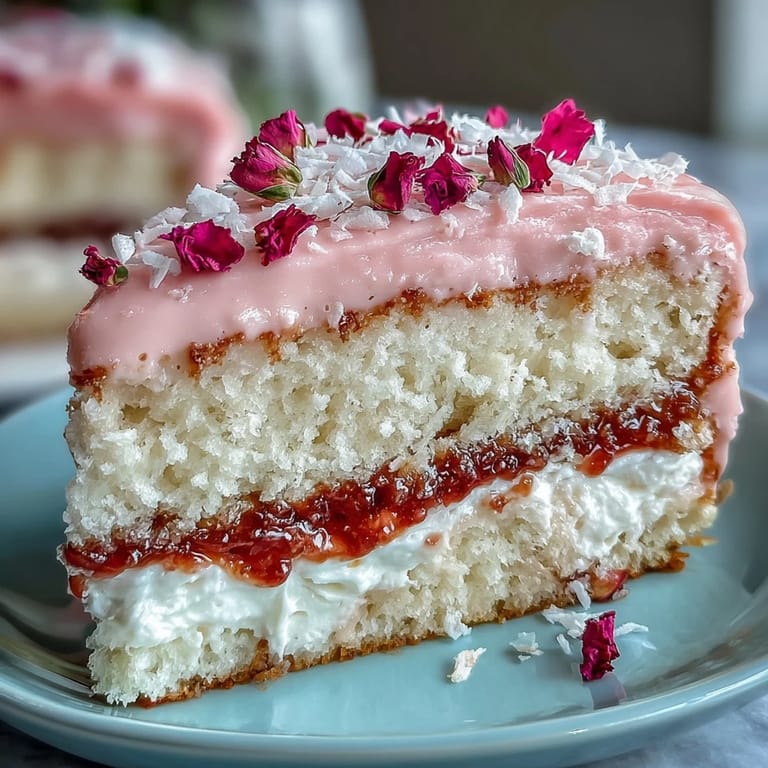
 My sister called me three days before Mother's Day in a panic—she'd promised Mom a homemade cake but had no idea where to start. I walked her through this pink ombre creation over the phone, and something magical happened: the nervousness in her voice transformed into quiet confidence as she mixed the batter. When she sent me photos of the finished cake, I realized this wasn't just about the recipe anymore—it was about showing up for someone you love with your own hands.
I'll never forget frosting my first ombre cake at midnight in my tiny kitchen, standing on tiptoes to reach the top layer, pink buttercream somehow ending up in my hair. My partner walked in, took one look at the chaos, and instead of laughing, grabbed a spatula and helped me smooth the sides. We didn't say much—just worked in that comfortable silence—and when we finally stepped back, we both knew it was beautiful enough to give away.
Ingredients
- All-purpose flour (2 ½ cups): The foundation of a tender crumb—make sure it's sifted or whisked well to avoid dense layers.
- Baking powder (2 ½ tsp): This is what gives you those three light, airy layers; don't skip it or reduce it.
- Unsalted butter (1 cup for sponge, 1 ½ cups for buttercream): Room temperature is non-negotiable—cold butter won't cream properly and you'll end up with a grainy texture.
- Granulated sugar (2 cups): The sweetness and structure; creaming it with butter properly takes a full 3–4 minutes, not less.
- Eggs (4 large, room temperature): They emulsify the batter and trap air; cold eggs will break the mixture apart.
- Pure vanilla extract (1 tbsp plus 2 tsp): The soul of this cake—use real vanilla, not imitation, and you'll taste the difference.
- Whole milk (1 cup, room temperature): The alternating technique with flour keeps the batter balanced and prevents overdevelopment of gluten.
- Powdered sugar (5 cups, sifted): Sift it before measuring or you'll end up with a grainy buttercream that tastes gritty.
- Pink food coloring (gel preferred): Gel won't thin your buttercream like liquid coloring does, and the shades are more vibrant.
- Edible flowers: Violets, pansies, and rose petals add elegance; source them from specialty food stores or farmers markets, never from a florist.
Tired of Takeout? 🥡
Get 10 meals you can make faster than delivery arrives. Seriously.
One email. No spam. Unsubscribe anytime.
Instructions
- Set yourself up for success:
- Preheat your oven to 350°F and get those three cake pans lined with parchment paper—this prevents sticking and ensures even baking. Pull your butter, eggs, and milk out of the fridge now so they warm to room temperature while you prep; this step genuinely changes the texture of your final cake.
- Whisk the dry ingredients:
- In a medium bowl, whisk together the flour, baking powder, and salt—this aerates the flour and distributes the leavening evenly. You'll see the mixture get slightly lighter and fluffier, which is exactly what you want.
- Cream the butter and sugar:
- In your large mixing bowl, beat the room-temperature butter and sugar together on medium-high speed for 3–4 minutes until it's pale, fluffy, and looks almost like wet sand. This process incorporates air into the batter, which becomes steam in the oven and gives you those tender layers.
- Add the eggs thoughtfully:
- Beat in the eggs one at a time, waiting for each one to fully incorporate before adding the next—this prevents the mixture from looking broken or curdled. Add your vanilla extract with the final egg.
- Alternate flour and milk:
- Starting with the flour mixture, add one-third of it to the butter mixture and mix on low speed until just combined. Add half the milk, then another third of flour, the remaining milk, and finally the last third of flour, mixing gently each time until just barely combined—overmixing develops gluten and makes your cake tough.
- Divide and bake:
- Pour the batter evenly into your three prepared pans—I use a kitchen scale to make sure each gets the same amount for even layers. Bake for 25–30 minutes until a toothpick inserted in the center comes out clean or with just a few moist crumbs.
- Cool with patience:
- Let the cakes cool in their pans for exactly 10 minutes (this allows them to set without sticking), then turn them out onto wire racks to cool completely—do not frost a warm cake or your buttercream will melt.
- Make the buttercream magic:
- Beat room-temperature butter on high speed for 2–3 minutes until it's light and creamy, then gradually add your sifted powdered sugar while mixing on low to avoid a flour cloud in your kitchen. Add vanilla and milk, then beat on high for a full 3 minutes—this aeration is what makes it fluffy and spreadable.
- Create the ombre effect:
- Divide your buttercream into four bowls: leave one white and add increasing drops of gel food coloring to the others to create a light-to-dark gradient. The gel lets you control the intensity without thinning the buttercream like liquid coloring does.
- Stack and frost:
- Place your first cake layer on your serving plate, spread the darkest pink buttercream on top, add the second layer with medium pink, then the final layer. Frost the top with light pink and cover the sides with white buttercream, using an offset spatula to smooth everything into a clean finish.
- Blend or keep it clean:
- If you want a fully blended ombre effect up the sides, use a bench scraper in upward strokes to blend the colors together—if you prefer defined color blocks, just leave it as is. Both look stunning.
- Decorate and chill:
- Arrange your edible flowers on top just before serving for maximum freshness, then chill the cake for at least 30 minutes so the frosting sets and you get clean slices instead of frosting smears.
 Save to Pinterest
 Mom cried when she cut into that cake—not because it was perfect (the flowers were slightly crooked and one layer was a hair thicker than the other), but because my sister had made it. The taste didn't matter as much as the fact that she'd chosen to spend an afternoon in the kitchen, making something delicate and beautiful for someone she loved.
The Vanilla Sponge: Why It Works
This particular sponge recipe uses a creaming method, which means you're building structure through air incorporation rather than relying on lots of eggs or oil. The alternating flour-and-milk technique keeps the batter from becoming too thick or too thin, which is what allows those layers to bake evenly and stay impossibly tender. I've made dense cakes before by either overmixing or skipping steps, and this recipe forgives neither—but if you follow it with intention, you'll understand why it's so beloved.
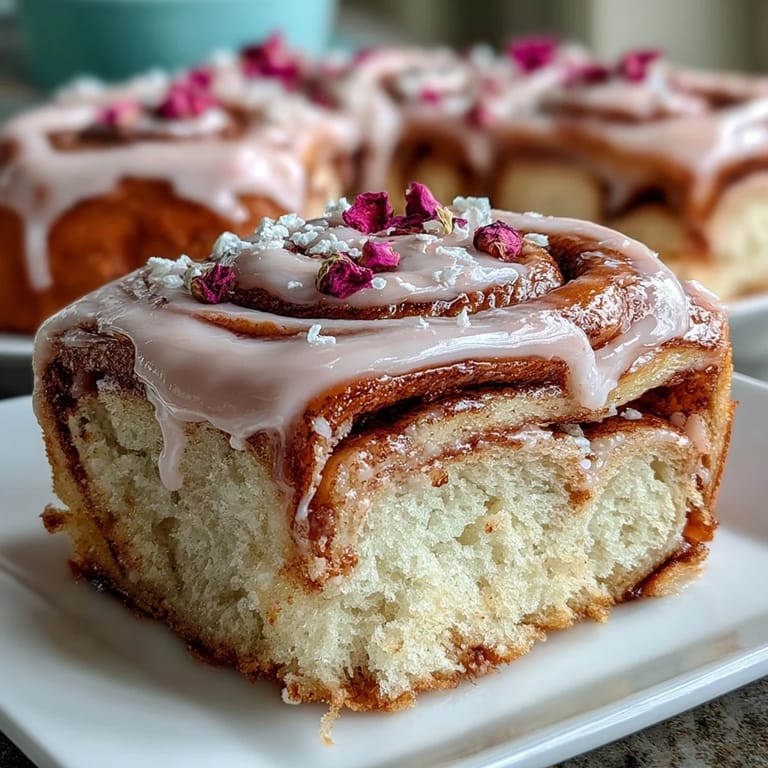
Working with Pink Ombre Buttercream
The ombre effect sounds intimidating until you realize it's just buttercream in varying shades stacked on top of each other. Start with your darkest color on the bottom layer where it's less visible, move to medium on the middle layer, and finish with pale pink on top—this way, even if your blending isn't perfect, the gradient still reads beautifully. If you want the color to blend seamlessly up the sides, use a bench scraper or even a warm, damp offset spatula to pull the colors upward in gentle strokes, working slowly and letting gravity help you.
Flowers, Freshness, and Presentation
The flowers are what transform this cake from lovely to show-stopping, but timing matters—add them within an hour of serving so they stay perky and vibrant. Source your edible flowers from specialty food shops or farmers markets where they're grown specifically for eating, never from a florist where they've been treated with pesticides. I like to add a mix of colors and sizes for visual interest, clustering some densely and scattering others loosely across the top and down one side for an effortless, garden-party feel.
- Edible violets and pansies hold their shape beautifully and add pops of color that photograph wonderfully.
- Fresh rose petals work too, but add them last since they bruise easily and can look tired after sitting for even an hour.
- If any flowers aren't food-safe, place them on top as decoration and remind guests to remove them before eating—better safe than sorry.
 Save to Pinterest
 This cake is more than a recipe—it's permission to make something beautiful for someone who matters. Whether it's perfect or slightly lopsided, what people taste is the care you put into it.
Your Questions Answered
- → What is the best way to create the pink ombre effect in buttercream?
Divide the buttercream into portions and gradually add pink food coloring in increasing amounts to each. Apply from darkest to lightest on cake layers and blend gently for a smooth gradient.
- → How can I ensure the vanilla sponge remains tender?
Carefully alternate adding dry ingredients and milk, mixing until just combined to avoid overworking the batter, which keeps the sponge soft and moist.
- → Can I use alternative flowers for decoration?
Yes, opt for edible flowers such as violets, pansies, or rose petals. Ensure flowers are pesticide-free and safe for consumption before using.
- → How long should the cake be chilled before slicing?
Chilling for at least 30 minutes firms the buttercream layers, making it easier to slice cleanly without smudging.
- → Is there a way to add extra flavor to the cake layers?
Brushing cooled layers with simple syrup adds moisture and enhances the vanilla flavor, providing a richer taste experience.