 Save to Pinterest
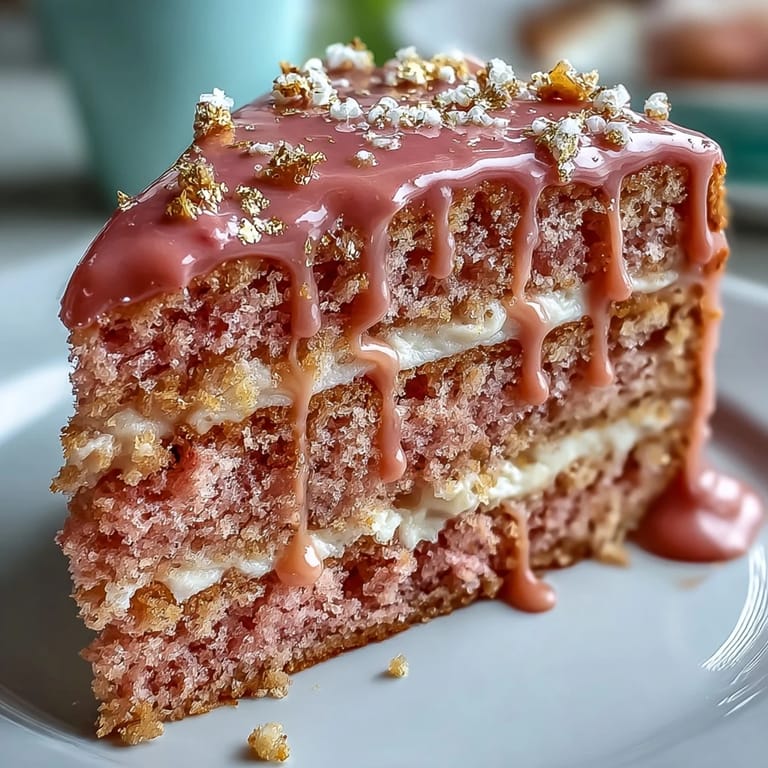
 The first thing that struck me about baking this Rosé Velvet Cake was the way the scent of chilled wine mingled with sugar in my kitchen, setting the tone for a truly celebratory afternoon. Rather than fussing alone, I found myself laughing with a friend, both of us elbow-to-elbow over bowls of pale pink batter and frosting. There’s something delightfully unexpected about pouring rosé into cake mix. It was a playful mood from the start—this is a cake that feels like wearing your party shoes for no reason at all. The gold drip? That’s just the invitation to let your inner glam run wild.
I remember making this for a friend’s bridal shower one spring, when the living room was crowded with laughter and clinking glasses. As we revealed the cake, a hush descended—sparkling gold catching the sunlight, everyone reaching for their phones, and a chorus of oohs echoing around the room. The look on my friend’s face as she tried the first bite convinced me this recipe was going to be a repeat occasion dish.
Ingredients
- Cake flour: For that classic, tender crumb—sift twice for ultimate lightness.
- Granulated sugar: It’s the backbone of the cake’s sweetness and keeps the texture just right.
- Baking powder & baking soda: A combination I’d never skip; they guarantee the perfect lift and crumb.
- Salt: Essential for balancing all that sweet, just a little pinch draws the other flavors out.
- Unsalted butter: Softened for easy blending, it lends a creamy richness without overpowering the wine.
- Vegetable oil: Adds moisture—learned the hard way that all-butter can turn cake dry in a day.
- Eggs: Bringing them to room temp makes for silky, even batter.
- Rosé wine: Not sparkling; use one you’d drink—a little extra goes into the chef’s glass, of course.
- Vanilla extract: I once forgot it and noticed immediately; it ties everything together.
- White vinegar: The sleeper ingredient that reacts with baking soda for that signature tender crumb.
- Pink gel food coloring: Completely optional, but a couple of drops gives the cake its rosy charm.
- Cream cheese: Soft and tangy, it’s a dream base for the frosting.
- Powdered sugar: Sifted for lump-free, pillowy icing every time.
- Heavy cream: Needed for that smooth white chocolate drip—don’t skip chilling before dripping.
- White chocolate: Use good-quality—cheap can seize up and ruin your drizzle game.
- Edible gold luster dust: Genuine show-stopper; just make absolutely sure it’s food-grade.
- Vodka or lemon extract: Turns gold powder into a paint—vodka evaporates, so the finish is flawless.
- Parchment paper: Trust me, your cake will come out happy and whole every time.
Tired of Takeout? 🥡
Get 10 meals you can make faster than delivery arrives. Seriously.
One email. No spam. Unsubscribe anytime.
Instructions
- Ready the pans:
- Grease and line three 8-inch round pans—parchment circles make all the difference for easy release.
- Mix the dry ingredients:
- Whisk together cake flour, baking powder, baking soda, and salt; I love how the mixture feels soft and cool between my fingers.
- Cream the butter and sugar:
- Beat butter, oil, and sugar until pale and fluffy, about 3 minutes—it should look like thick vanilla ice cream.
- Incorporate the eggs:
- Add eggs one by one, beating between each, then stir in vanilla and vinegar for a glossy, cohesive mixture.
- Alternate flour and wine:
- Begin and end with flour, pouring in rosé in between; add a little pink gel food coloring here if you like a true blush hue.
- Bake to perfection:
- Divide batter into pans, smooth the tops, and bake at 350°F until a toothpick comes out clean—your kitchen will smell faintly floral and festive.
- Cool the cakes:
- Let cakes rest in pans for 10 minutes, then gently turn out onto racks to cool fully (patience is key for perfect assembly).
- Whip the frosting:
- Beat cream cheese and butter until smooth, adding powdered sugar gradually, then finish with vanilla and a pinch of salt for balanced richness.
- Assemble with care:
- Level the cakes if needed, layer with frosting, and cover the outside with swoops and swirls for a billowy finish.
- Make the gold drip:
- Heat cream and pour over white chocolate; let it sit, then stir until silky—drip gently over the chilled cake edge for that waterfall effect.
- Paint the gold:
- Mix gold dust with vodka or extract to a paint, then brush it over drips—take your time and enjoy the sparkle as you work.
 Save to Pinterest
 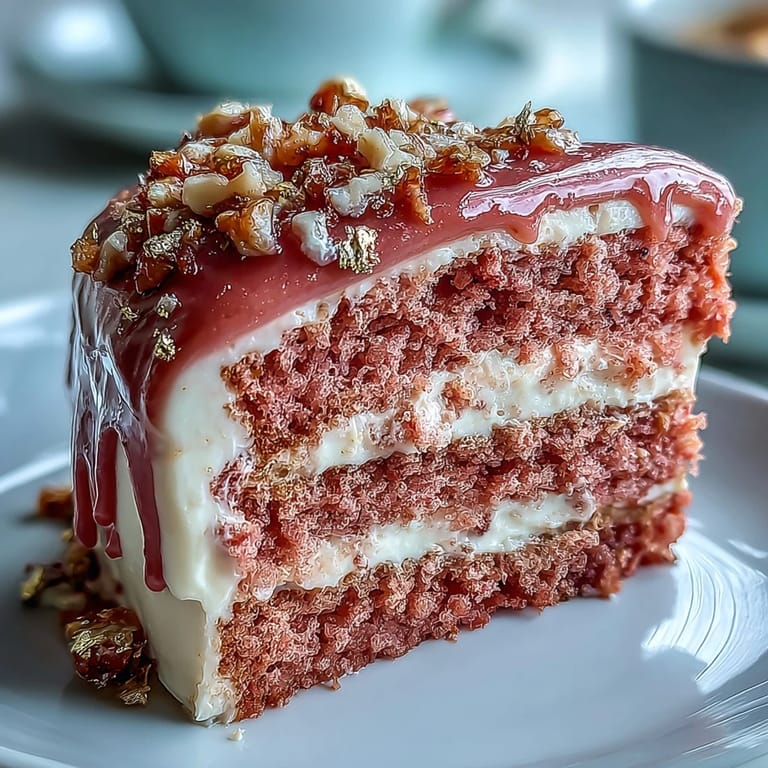 Save to Pinterest
 The moment this cake really shone for me was when we set it down in the middle of a table piled with flowers and champagne coupes, and everyone gathered for a toast. A friend, surprised by the hint of rosé in each bite, nudged me with a grin, and suddenly it was so much more than a dessert—it was a centerpiece for connection and celebration.
How to Paint That Gold Drip Like a Pro
Getting that luminous gold finish always made me feel like a pastry artist in my own kitchen. My best results came when the ganache drip had set perfectly cold—I avoided smudges and could layer the luster just how I wanted. Using a tiny food-safe paintbrush (one reserved just for cakes!) keeps the edges crisp. A gentle touch and patience really reveal the magic as you work around the cake.
Making It Alcohol-Free (and Still Gorgeous)
I once baked this cake for a celebration with expectant guests, swapping rosé for a mix of pink grape juice and a splash of lemon juice. The color stayed lovely and the cake had a fresh, fruity flair that didn’t miss the wine at all. It’s proof that you can still create a festive, blush-hued showpiece—no alcohol required. The gold drip and cream cheese frosting are what steal the spotlight anyway.
Serving and Storage Tricks for Breezy Entertaining
If there’s one thing I’ve learned, it’s to chill the cake before slicing for neat, photo-worthy servings. Putting the cake in the fridge after frosting helps the layers set and makes those gold drips shine. Always bring to room temperature before serving so you get the full range of flavors and creamy texture.
- Store slices individually wrapped for grab-and-go treats.
- Pair with any rosé (bubbly or still) for party-perfect vibes.
- Make the gold drip a few hours ahead to keep finishing easy on party day.
 Save to Pinterest
 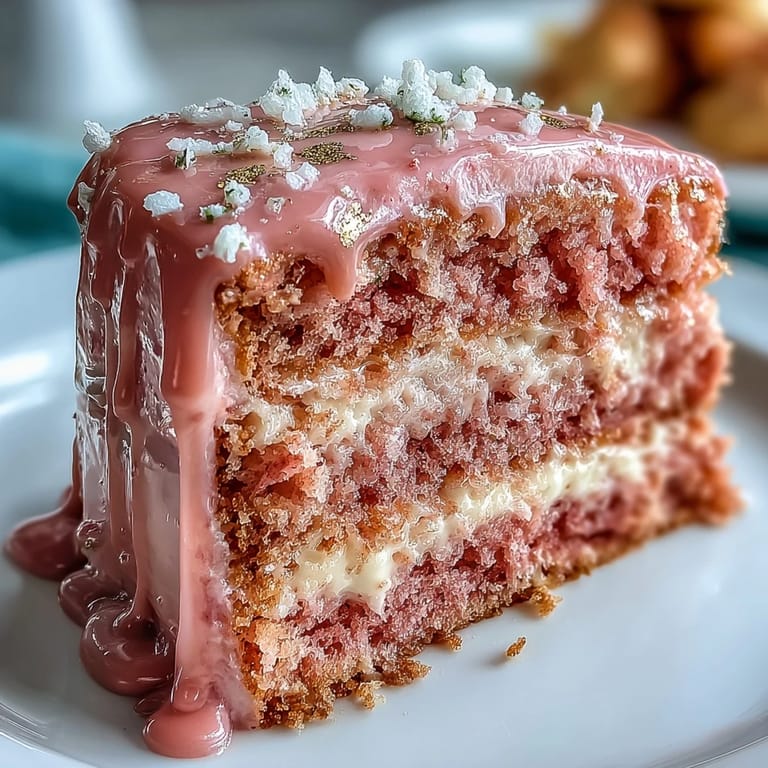 Save to Pinterest
 However you choose to serve this Rosé Velvet Cake, just know you’ll be the reason everyone wants the recipe. Here’s to delicious memories and golden moments that last long after the last slice is gone.
Your Questions Answered
- → Can I make an alcohol-free version?
Yes. Substitute equal parts pink grape juice plus a splash of lemon juice for the rosé to keep the color and acidity without alcohol.
- → How do I achieve a deeper pink hue?
Use a concentrated gel food coloring or a small amount of powdered freeze-dried strawberry; add sparingly to avoid altering batter consistency or flavor.
- → How do I get a smooth cream cheese finish?
Soften cream cheese and butter completely, beat until smooth, add powdered sugar gradually, then chill the cake after a crumb coat before final frosting to reduce crumbs and sliding.
- → What’s the best way to make the gold drip?
Make a white chocolate ganache with heated cream, cool slightly, and drip over a thoroughly chilled cake. Mix edible gold luster dust with vodka or lemon extract to a paint-like consistency and brush onto set drips with a food-safe brush.
- → Can layers be baked ahead of time?
Yes. Once cooled, wrap layers tightly and refrigerate for up to 2 days or freeze for up to 1 month. Thaw and bring to room temperature before leveling and assembling.
- → How should I store the finished cake?
Store refrigerated due to the cream cheese frosting. Remove from fridge 30–60 minutes before serving to allow the texture and flavors to relax.