 Save to Pinterest
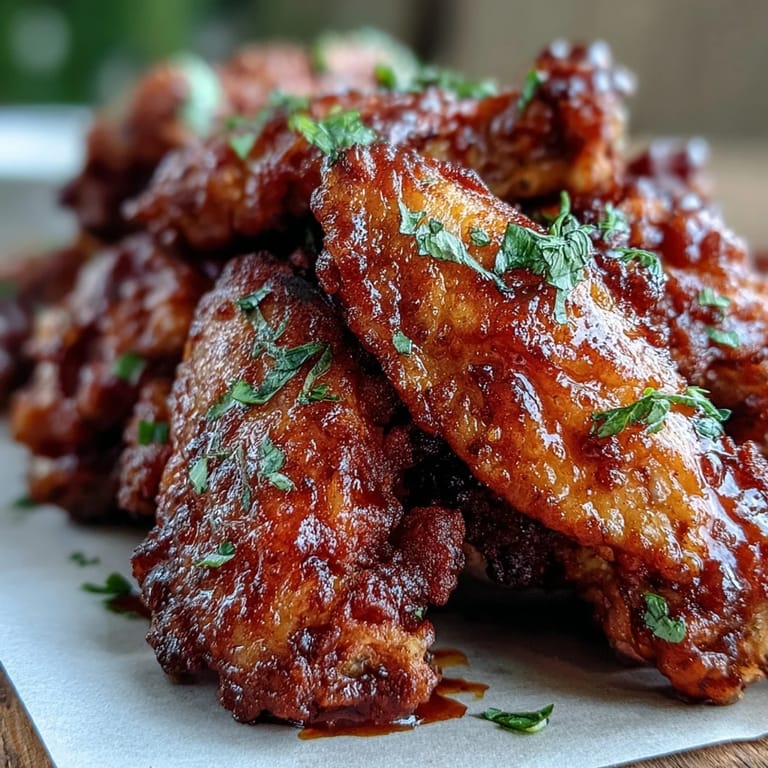
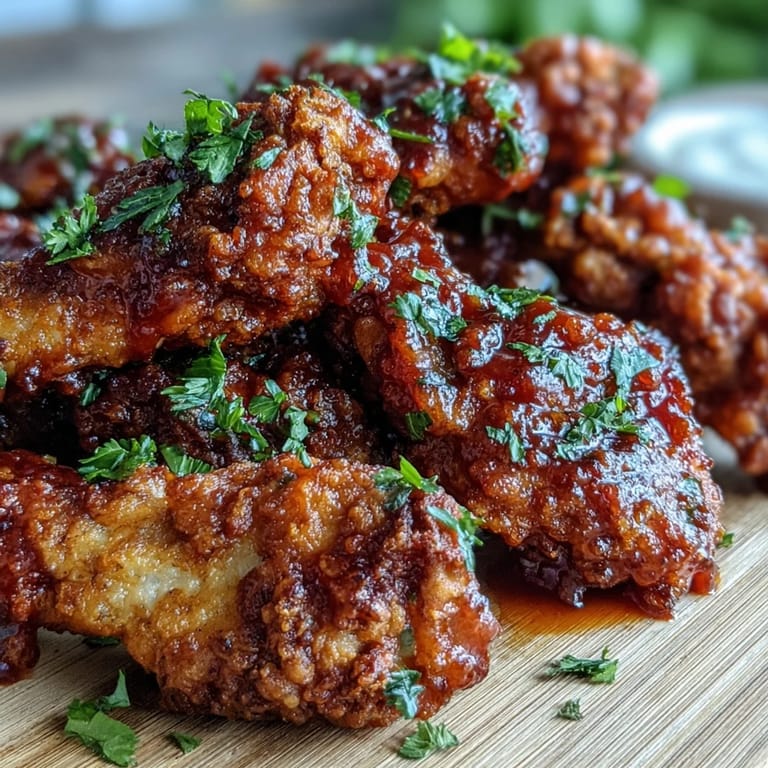
 My tiny apartment kitchen became an impromptu wing factory last Super Bowl Sunday, with three different sauces bubbling on the stove and flour dusting every surface. These wings have been my go-to for years now, ever since I figured out that restaurant-style crunch comes down to buttermilk and the right flour blend. Something magical happens when that crispy skin hits your choice of sauce, suddenly turning a simple appetizer into the main event everyone crowds around.
Last summer, my friend Sarah claimed she hated chicken wings until she tried these. She stood by the stove, eating them straight from the cooling rack and ignoring the actual dinner I had planned. Now she requests them for every gathering, and I have learned to make double batches.
Ingredients
- Chicken wings: Separating them yourself saves money, and those wing tips make incredible homemade stock later
- Buttermilk: The tang tenderizes the meat and helps the flour coating stick like a dream
- Flour and cornstarch blend: This combination is what gives you that shatteringly crisp exterior that stays crunchy even under sauce
- Baking powder: The secret ingredient that creates extra air pockets in the coating for maximum crunch
- Hot sauce, butter, and honey: The classic Buffalo trio, but that tiny bit of honey balances the heat perfectly
Tired of Takeout? 🥡
Get 10 meals you can make faster than delivery arrives. Seriously.
One email. No spam. Unsubscribe anytime.
Instructions
- Marinate the Wings:
- Toss your wings in that buttermilk mixture and forget about them for at least 30 minutes, though overnight in the fridge makes them even better. The garlic and onion powder in the marinade means flavor goes all the way through, not just on the surface.
- Set Up Your Coating Station:
- Whisk together the flour, cornstarch, and baking powder until well combined. I like to do this in a wide shallow bowl so I can really press the coating onto each wing.
- Coat Each Wing:
- Let the excess buttermilk drip off, then dredge each wing thoroughly in the flour mixture, pressing gently to help it adhere. Place them on a wire rack and let them rest for 10 minutes, which helps the coating set before frying.
- Heat Your Oil:
- Fill a heavy pot or Dutch oven with about 2 inches of oil and heat it to 350°F. If you do not have a thermometer, drop in a small piece of bread, it should sizzle immediately and turn golden in about 30 seconds.
- Fry in Batches:
- Crowding the pan drops the oil temperature and makes wings soggy, so work in batches. Fry for 8 to 10 minutes, turning occasionally, until they are deeply golden and sound hollow when tapped.
- Make Your Sauces While Wings Drain:
- Whisk together the Buffalo sauce ingredients, combine the Thai chili sauce with lime, or warm up your favorite BBQ. Having sauces ready means you can toss wings immediately while they are still hot and crisp.
- Toss and Serve Immediately:
- Divide your wings into three bowls and toss each group with a different sauce, or let everyone choose their own adventure. Garnish with fresh chives and serve with celery sticks and plenty of napkins.
 Save to Pinterest
 These wings have become legendary among my friends, the thing people beg me to bring to potlucks and game day gatherings. There is something deeply satisfying about watching everyone crowd around the platter, debating which sauce is best while reaching for seconds.
Getting That Perfect Crunch
I spent years trying different coatings before landing on this flour and cornstarch combination. The cornstarch creates a lighter, crispier texture than flour alone, while the baking powder adds tiny bubbles that make the coating extra shatteringly crisp. Do not skip the resting step after coating, it really does make a difference in how well the coating adheres during frying.
Temperature Matters More Than You Think
Too cold and your wings will absorb oil, turning greasy instead of crispy. Too hot and the outside burns before the inside cooks through. I keep an instant read thermometer near the stove and adjust my heat as needed, pulling the pot off the burner briefly if the oil gets too hot between batches.
Sauce Strategy and Serving Ideas
I learned the hard way that tossing wings in sauce too early makes them soggy, so now I sauce them right before serving. Setting up a sauce bar lets guests customize, and having plenty of celery and carrot sticks helps balance the rich, crispy wings. For a party, I make three times the recipe and keep batches warm in a 200°F oven while frying the rest.
- Set up a cooling rack over paper towels so excess oil drains away while keeping wings crisp
- Have all your sauces made and warmed before you start frying
- Double everything if you are feeding more than four people because these disappear fast
 Save to Pinterest
 Whether you are feeding a crowd or just treating yourself on a Friday night, these wings turn any meal into something worth celebrating. Grab your favorite sauce and dig in.
Your Questions Answered
- → Can I make these wings ahead of time?
Yes, you can marinate the wings overnight for deeper flavor. Coat them in flour mixture up to 2 hours before frying and keep refrigerated. For best crispiness, fry just before serving, though you can reheat fried wings in a 200°C oven for 10 minutes.
- → What's the secret to extra crispy wings?
The combination of cornstarch and baking powder in the coating creates maximum crunch. For even crispier results, try double-frying: first at 150°C for 7 minutes, let cool, then fry again at 190°C for 2-3 minutes until golden.
- → Can I bake these instead of frying?
While frying gives the best texture, you can bake them at 220°C on a wire rack for 40-45 minutes, flipping halfway through. They won't be quite as crispy, but brushing with a little oil before baking helps achieve better browning.
- → What oil is best for frying chicken wings?
Sunflower, peanut, or vegetable oil work best due to their high smoke points. Use enough oil to reach 5 cm depth and maintain temperature at 175°C for even cooking. A thermometer is essential for monitoring oil temperature.
- → How do I know when the wings are fully cooked?
Wings should be golden brown and reach an internal temperature of 75°C. They typically take 8-10 minutes when frying at 175°C. The coating should be crispy and the meat should no longer be pink at the bone.
- → Can I make this gluten-free?
Absolutely. Replace the all-purpose flour with a gluten-free flour blend in the same quantity. The cornstarch and baking powder remain the same. Always check your sauce labels as some BBQ and hot sauces may contain gluten.